DIY Karaoke Machine Build
DIY Karaoke Machine
This is how my DIY Karaoke Machine started. My wife has always enjoyed singing. She discovered Karaoke in the Spring of 2017. Well she wanted to have a party with a Karaoke DJ (KJ). After a ton of researching to find a KJ she decided it was too expensive for too short a duration (4 hours). Well with only a few weeks to the potential Karaoke party, I said I’ll build you one. She said awww thanks sweetie but that’s OK.
In a day or two I had a working prototype. I showed my wife the rough skeleton of my DIY Karaoke Machine and she became excited. Then she gave me permission to buy what ever I needed to make a working machine.
Parts List
From my junk bin
- Laptop monitor 15.6″ (16:9 format)(recycled)
- Rasberry Pi 3B (donated)
- TinkerBoard (donated)
- 5amp 5volt regulator (bulk buy for another project)
- 2TB laptop drive (about 6 months recycled from a laptop)
- Hard plastic pelican like case (recovered from the trash)
- 60watt 12volt power brick (recycled)
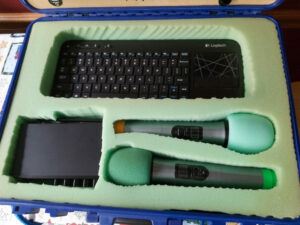
- Wireless keyboard with trackpad (from other projects)
Bought new
- Suptronics x800 HDD Expansion Board
- Karaoke music from a retired KJ (craigslist)
- HDMI and 1/8″ panel mount jack
- HDMI splitter (1in and 2out)
- Hobby grade plywood
- Wireless Microphones and mixer
- 32GB microSD card
- Driver board for the laptop monitor
DIY Karaoke Machine Assembly
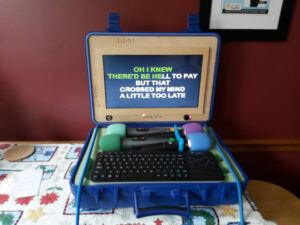
I loaded Raspbian Stretch on to a 32GB card. Connected the monitor to the driver board. Connected the monitor to the Raspberry Pi with a keyboard and mouse. Then used “sudo apt-get install pykaraoke” to install the Karaoke software. Opened pykaraoke and indexed my USB drive full of Karaoke music and the DIY Karaoke Machine was fully operational.
The Karaoke Machine case
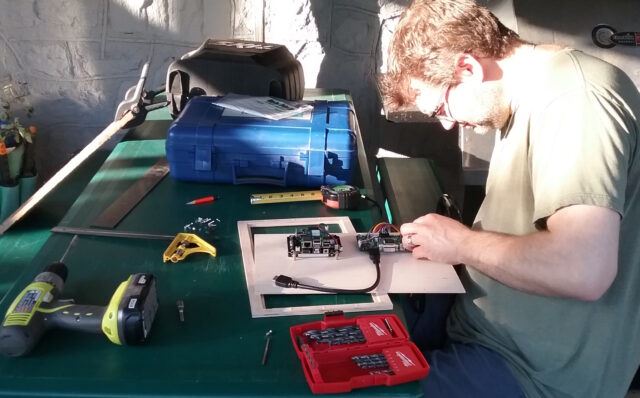
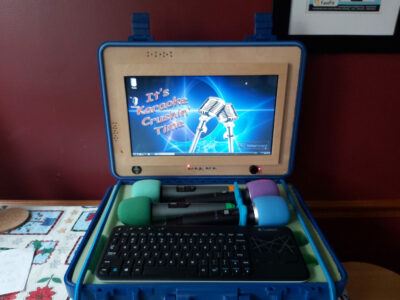
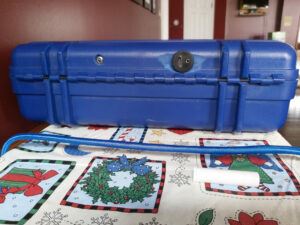
Now with a working setup I started building the final system. The hard plastics case I recovered from the trash is like a pelican case. The case lid was about two inches deep. After measuring a ton of times I decided to fit the monitor and all the electronics in the lid. The bottom of the case was about 4 inches deep so I would use this space to hold the mics, mixer, cords and keyboard.
Finished Machine
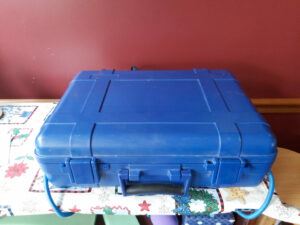

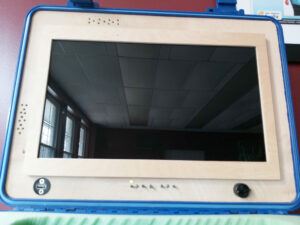
Sorry I didn’t get many pictures of the build process so here are a few of the finished machine. Because everything is held in the blue pelican like case it is pretty easy to transport. The monitor, driver board, Raspberry Pi, USB Karaoke drive, voltage regulator, and power switch are in the top of the case. Because the bottom is deeper it holds everything else and super easy to pack up and transport. It works really great and since 2017 when I first built this, it has been used dozens of times.
Never Really Finished


Because a lot of the karaoke music I bought contained a lot of Karaoke videos, I needed a way to play them too. Then I discovered the software (pykaraoke) I was using would search and index common video formats so I indexed the videos too.
The Raspberry Pi did a fine job playing the Karaoke music files (mp3+CDG), but played AVI files and other video formats with some minor glitching. I replaced the Raspberry Pi 3B with a TinkerBoard. After swapping the TinkerBoard in the karaoke machine would now play the video files with no glitches.
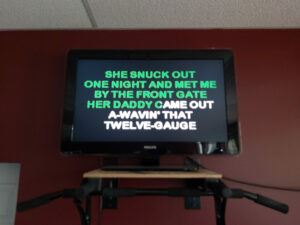
I then added a HDMI splitter so I could have a second karaoke screen. Because I couldn’t search for a song while someone was singing, I also created a digital songbook website. The digital songbook website allows singers to search my songs and make song request. Because I’m not much of a programmer the search tool could be better written, but I’m always improving. So this DIY Karaoke Machine and digital songbook website will never really be finished.
Has one comment to “DIY Karaoke Machine Build”
Mud Bunny - March 28, 2020
I’m lucky to have married an indulgent genius! xoxo