Coin Operated Arcade Machine, “Barrelcade”
Why An Arcade Machine
I’ve always wanted a coin operated arcade machine or cocktail table arcade machine. Since my Wife and I host get togethers we thought an arcade machine would help entertain our guests. So as with many of my projects I used a Raspberry Pi.
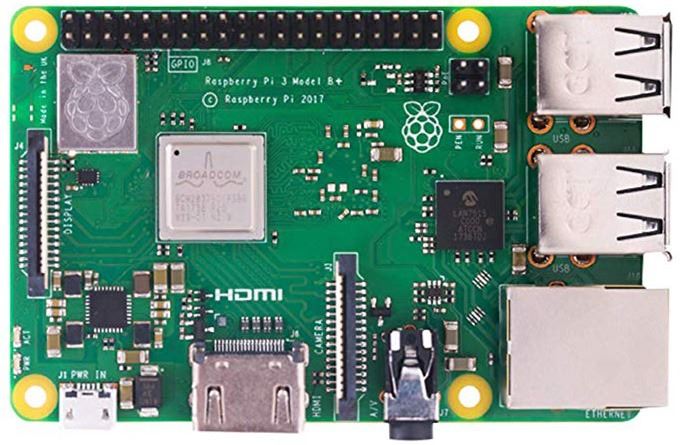
In case you never heard of or don’t know what a Raspberry Pi is, I’ll tell you. A Raspberry Pi is a single board computer about the size of a credit card. It was designed to help people learn to program and proto-type their ideas. I have used this small computer to build many things this is first of many Raspberry Pi posts.
Parts for my Barrelcade
I started with a Raspberry Pi 3B+ and the stock RetroPie 4.5.1. Download the image that works with the Raspberry Pi model you plan on using. Un fortunately there is not a supported RetroPie version for Raspberry Pi 4 yet.
Using the image downloaded from the RetroPie Team I put the image on a 32GB microSD card. I have good luck using Sandisk microSD cards my projects. So using SD Card Formatter for windows (download for MAC), I formatted my new microSD card. Then using Etcher, I put the RetroPie image on to the microSD card. All the ROMs are on a USB thumb drive for easy addition of new ROMs.
Monitor options


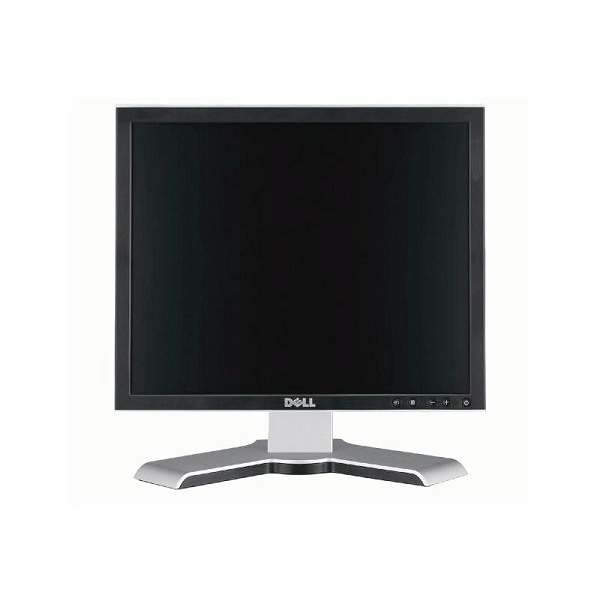
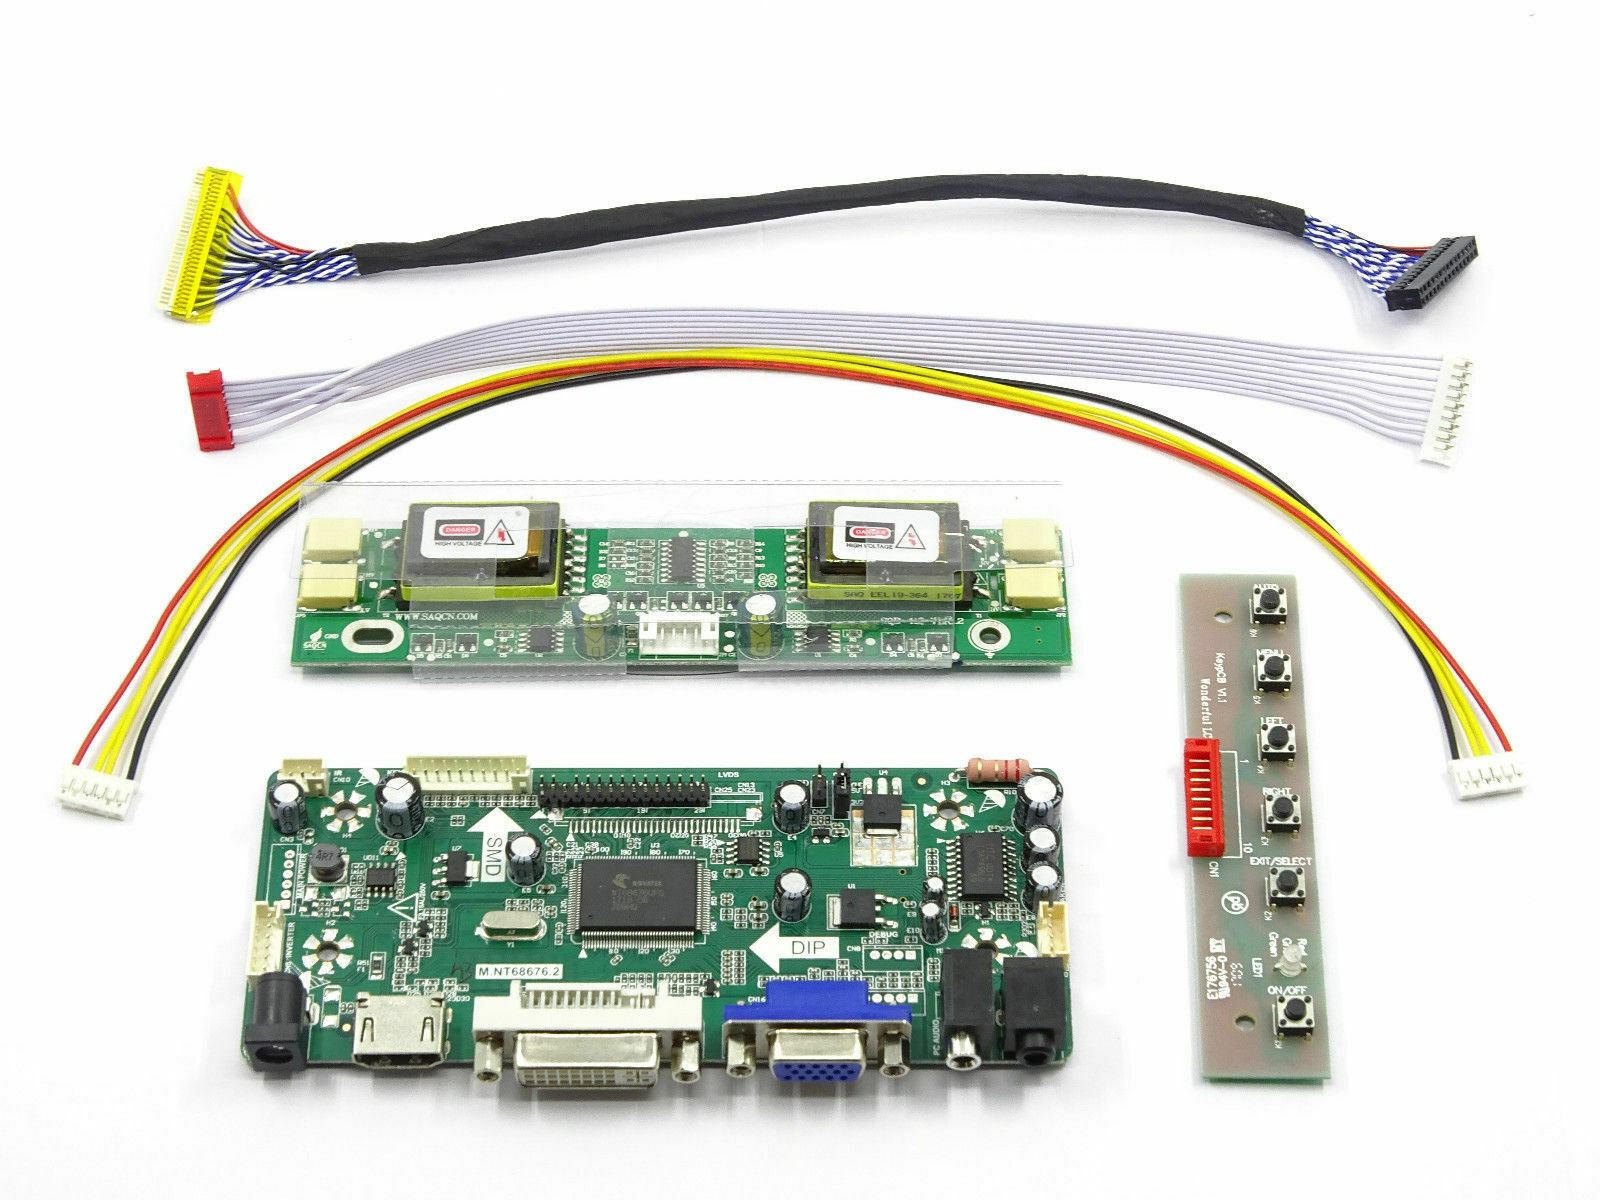
These two Dell Monitors had good LCD panels but the power supplies or driver board were bad. Both of these monitors were give to me and were destine for the trash. All I needed was the LCD panels. Neither panel appeared bad. So I removed the plastic bezel and case, then removed the LCD panels. Using the part number on the back of the LCD panels I bought driver boards for both panels. The driver boards had HDMI inputs, which makes them perfect for Raspberry Pi projects. Both monitors test good with new driver boards. One of these monitors will become part of the Barrelcade.
Power supply and regulators
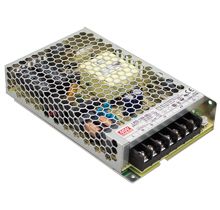
A 24 volt power supply will power all the electronics. Although this did create a ground loop and a bit of a hum. To remove the hum I added a ground loop isolator and the hum was gone. I used two 5 amp voltage regulators. One to power the Raspberry Pi and one to power the monitor with driver board. The Pi needs 5 volts at 2.5 amps, the monitor with driver board needs 12 volts at 2 amps, and the amplifier needs 24 volts at 4.5 amps.
Amplifier and isolation transformers
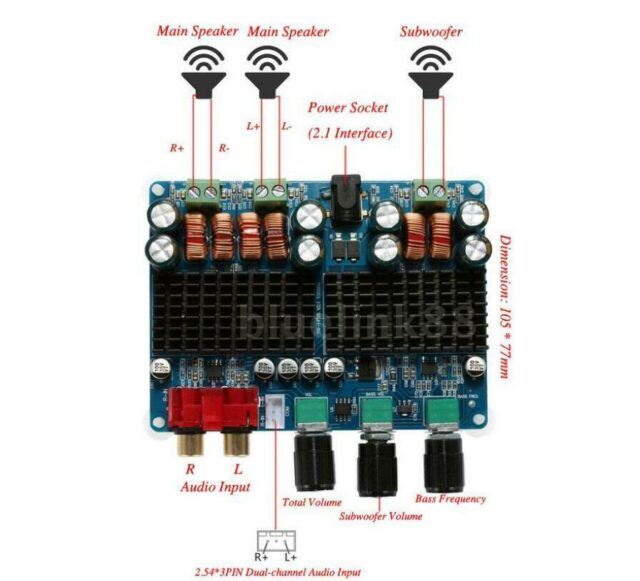
I used a 2.1 channel amp and made a ground loop isolator using audio isolation transformers. Another option would be to use separate power supplies to run the amplifier and Raspberry Pi. Since I already had the transformers for a ground loop isolator and a power supply big enough to run it all I used what I had.
Two player joystick kit
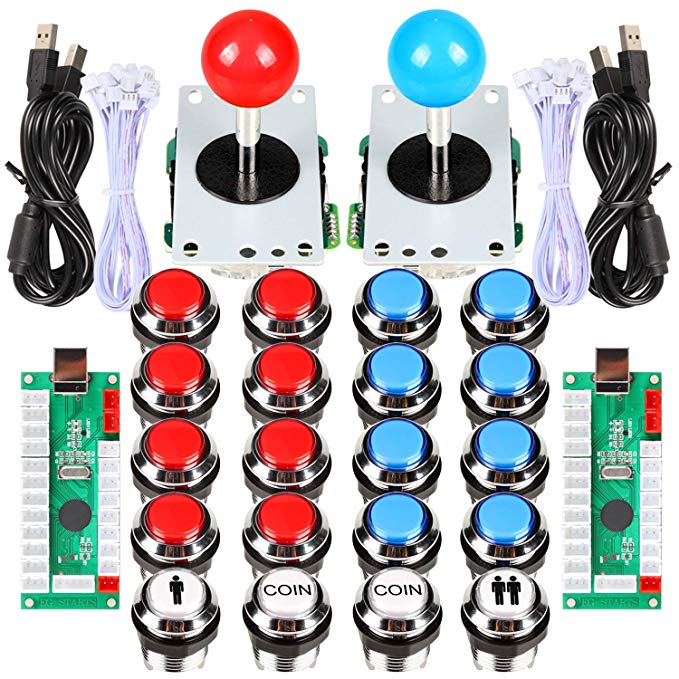
Since I was building a cocktail table style coin operated arcade machine cabinet I bought a two player kit. This kit came with two zero delay boards, sanwa style joysticks (convertible to 4 or 8 way), and Suzo-Happ style illuminated push buttons.
Spinner control parts

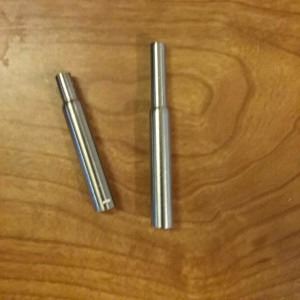
These four parts were used to make a spinner control for games like Tempest, Arkanoid, Breakout, and Circus. Playing games with the original controls make them more fun. You could always buy one from a place like Ultimarc for a little more money. My DIY spinner was under $40. For more information on the spinner check out my first instructable.
Working prototype

This in the prototype arcade machine, running Multi Arcade Machine Emulator (MAME), using the old Dell 19″ 16:10 monitor from above, and a box as a control panel. It all works very well. I was impressed with that tiny computer running all this software and giving such smooth performance. I did not load any modern games only classic coin operated games that I remembered playing from my childhood.
Assembling The Barrelcade
After talking to my wife, we decided a coin operated arcade machine built into a table would make a great dual purpose addition to the party space. A table for drinks, food, and game play. After looking at cocktail tables that could be converted, and other prebuilt machines, I stumbled onto Barrel Of Kong. We both liked the idea of using an old wine barrel from the vineyard down the road. Next thing you know I bought a barrel.
Cleaning the barrel

I started by pressure washing the outside of the barrel. Then after drying for a few weeks I removed the top and started work on turning the barrel into a Barrelcade. There were any number of ways to turn this barrel into a video gaming table. I did take a lot of inspiration from Barrel Of Kong. Using the Google Machine there was so many ideas. This is not an original idea I know but certainly a popular one.
Tighten the barrel’s staves
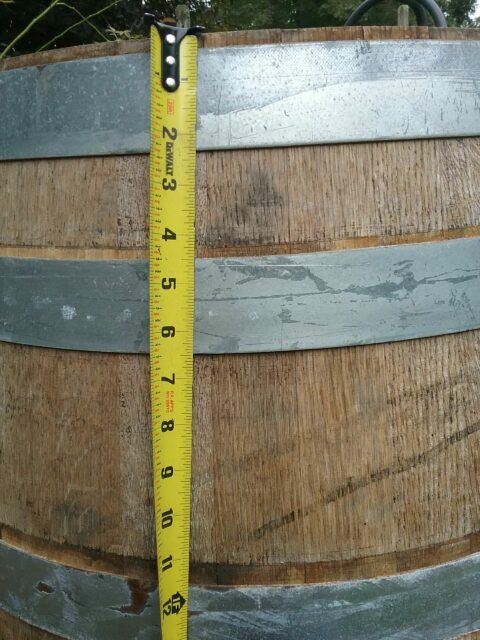
Barrels are made to have liquids in them. If left dry they shrink and become loose. Because I’m not a cooper I decided to remove the nails holding the barrel rings in place, then hammer the rings down to tighten the staves. The rings moved down about 1/2″ and the barrel staves were now tight again. I’m not sure the barrel will remain tight as it may shrink some more.
Subwoofer and legs
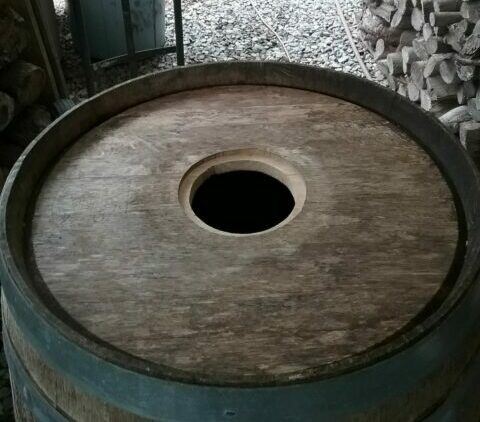
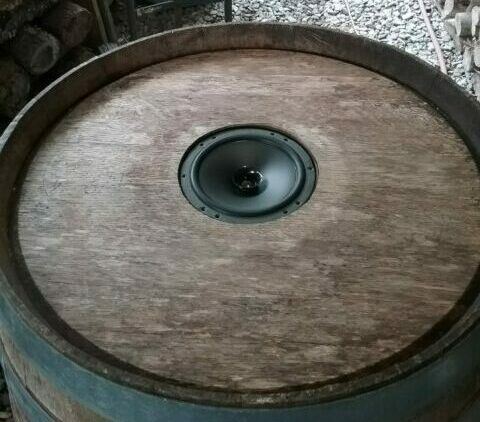

I decided to put a subwoofer in the bottom of the barrel. Not many of the classic coin operated games use or need a subwoofer. I figured why not it won’t hurt anything. So I cut a hole and a recess so the subwoofer would sit flush. Then I added legs so the final height would be at bar height. A friend was concerned that the bottom of the barrel wouldn’t be strong enough to support the system so I load tested it. Looks like it’s plenty strong enough.
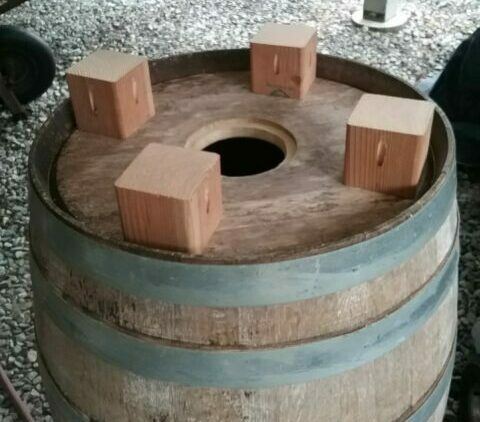
Barrelcade build progress
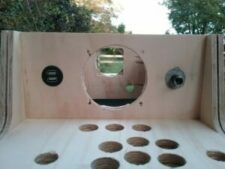
I cut a round top from 3/4″ plywood and recessed the monitor into it so there’s about a 1/8″ reveal. Then I attached side panels and control panels. Installed the joysticks and buttons. Then test fitted into the barrel cutouts. Starting to look like the image in my head. I should note I don’t have a plan. I’m just figuring it out as I go and it’s coming out better than I expected. With a good test fit I will disassemble to router a “T” molding groove and paint the wood.
Ready for paint
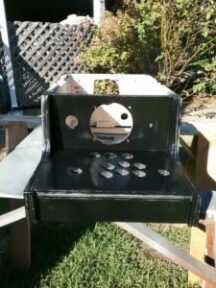
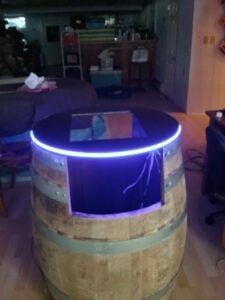
After cutting the “T” molding slot all the panels were sanded and ready for painting. I was going to use “T” molding for the controller panel and the top. At the last minute I decided to use RGB LED Neon Rope lights for the top ring and barrel under glow. This required a 3/8″ slot cut in the side of the bezel/top ring. I used my router table and a 3/8″ slot cutter. It looks pretty great and very excited to finish this thing.
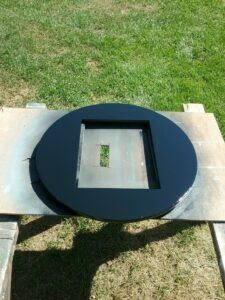
Bezel artwork
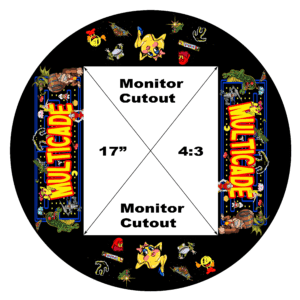
This is the bezel art I made for the Barrelcade. It was printed on outdoor premium banner vinyl. It’s pretty heavy duty vinyl and should hold up well. Because the bezel art will be under glass, there’s even more protection. All the plywood edges were slotted for chrome t-molding, to match the chrome illuminated push buttons.
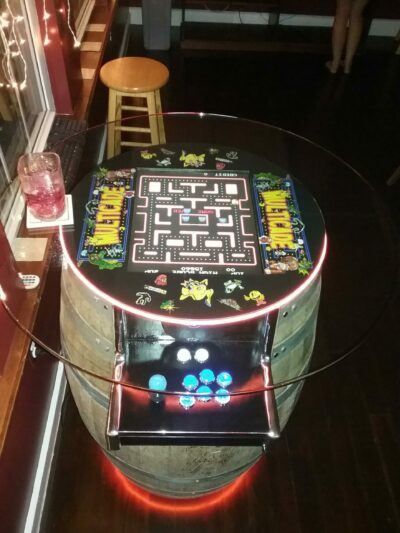
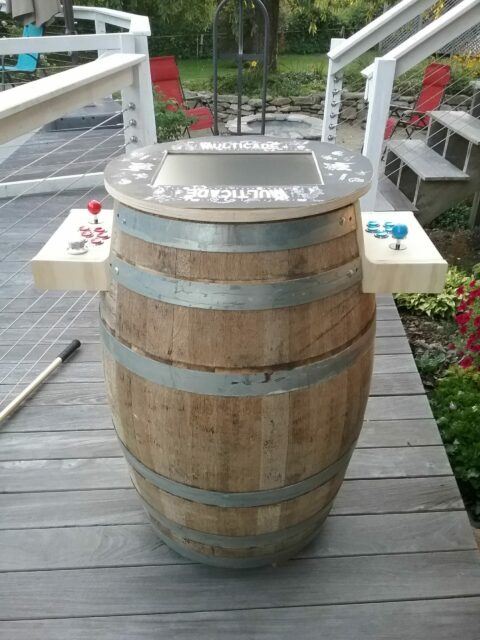
Completed Barrelcade
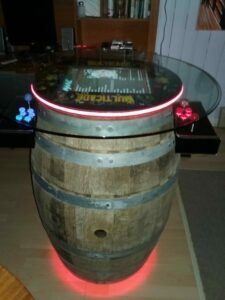
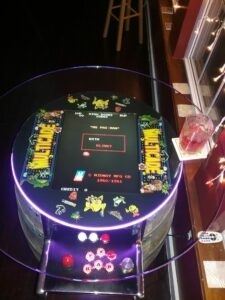
The completed Barrelcade looks and works great too. It’s not exactly a coin operated arcade machine but is still super cool. In the end I used the 17″ Dell Monitor and all the games loaded are configured for a vertical monitor. I rotated the monitor 90 degrees so it’s configure as 4:5. RetroPie was configured to fill and rotate the game field. Kristina and I are so happy with how it turned out. The Barrelcade has been moved into the party room and ready to party.
You can find all the build process photos in our Photo & Video Galleries page.